This year I'm documenting my fall activities in a file folder mini album and few pages in my 12x12 scrapbook. I have tutorial on my YouTube channel on how I created the mini album with an alternate way to decorate the pages.
I'm all about PASTEL HALLOWEEN this year. I mixed all the Little Hot Tamale pastel Halloween collections and pulled some neutral supplies to sprinkle in here and there, like bakers twine, narrow RicRac, silver thread, gemstones, ribbon, vellum, holographic paper, and 2 punches (scalloped circle & border punch).
For each page I left about 1/8 of an inch border to show off a bold black edge of the file folder. It really makes the pastels pop. Before I adhered any pages to the album I sewed around the edge of each page (basic sewing machine, no backstitch). Then I hot glued each page in sections (top, middle section, bottom) on just the sides. ****NOTE**** If you decide to make something similar, pause the gluing. There are ways to add additional tuck spots by being a little strategic with your glue. More details later...

This album I tried to utilize every page for journaling and photos. To start off strong I created a side loading pocket on the front. This is also a great way to show off your pretty pocket cards or pics. I intend to add journaling on the back of mine and use some as photo mats.

I love creating layered embellies. To keep everything cohesive I stuck with vellum, holographic paper, gemstones, and silver thread to help build up my embellishment clusters. It also makes it so much easier when you have less options (says the person that mixed all the LHT pastel collections, lol). Anyway... This pumpkin embelli consists of a scalloped circle, spider web die cut (Michaels, last year), messy thread, foam tape, then the pumpkin. To add a little sparkle and fill the empty space on the scalloped circle I added a gem and a bat. It also helps to balance out the visually heavy pumpkin with something delicate.

Page 1 is a pocket page. I added tags in various sizes to create more interest and it gave me a chance to use leftover DMC embroidery floss.

It's in the details. Vellum border punch, messy thread, Franki's monster cone, glitter star, pumpkin word, and gemstone. I seriously LOVE these gems. They are from Hobby Lobby, the pastel sparkle faceted set. So pretty in person. Perfect for the empty spaces.
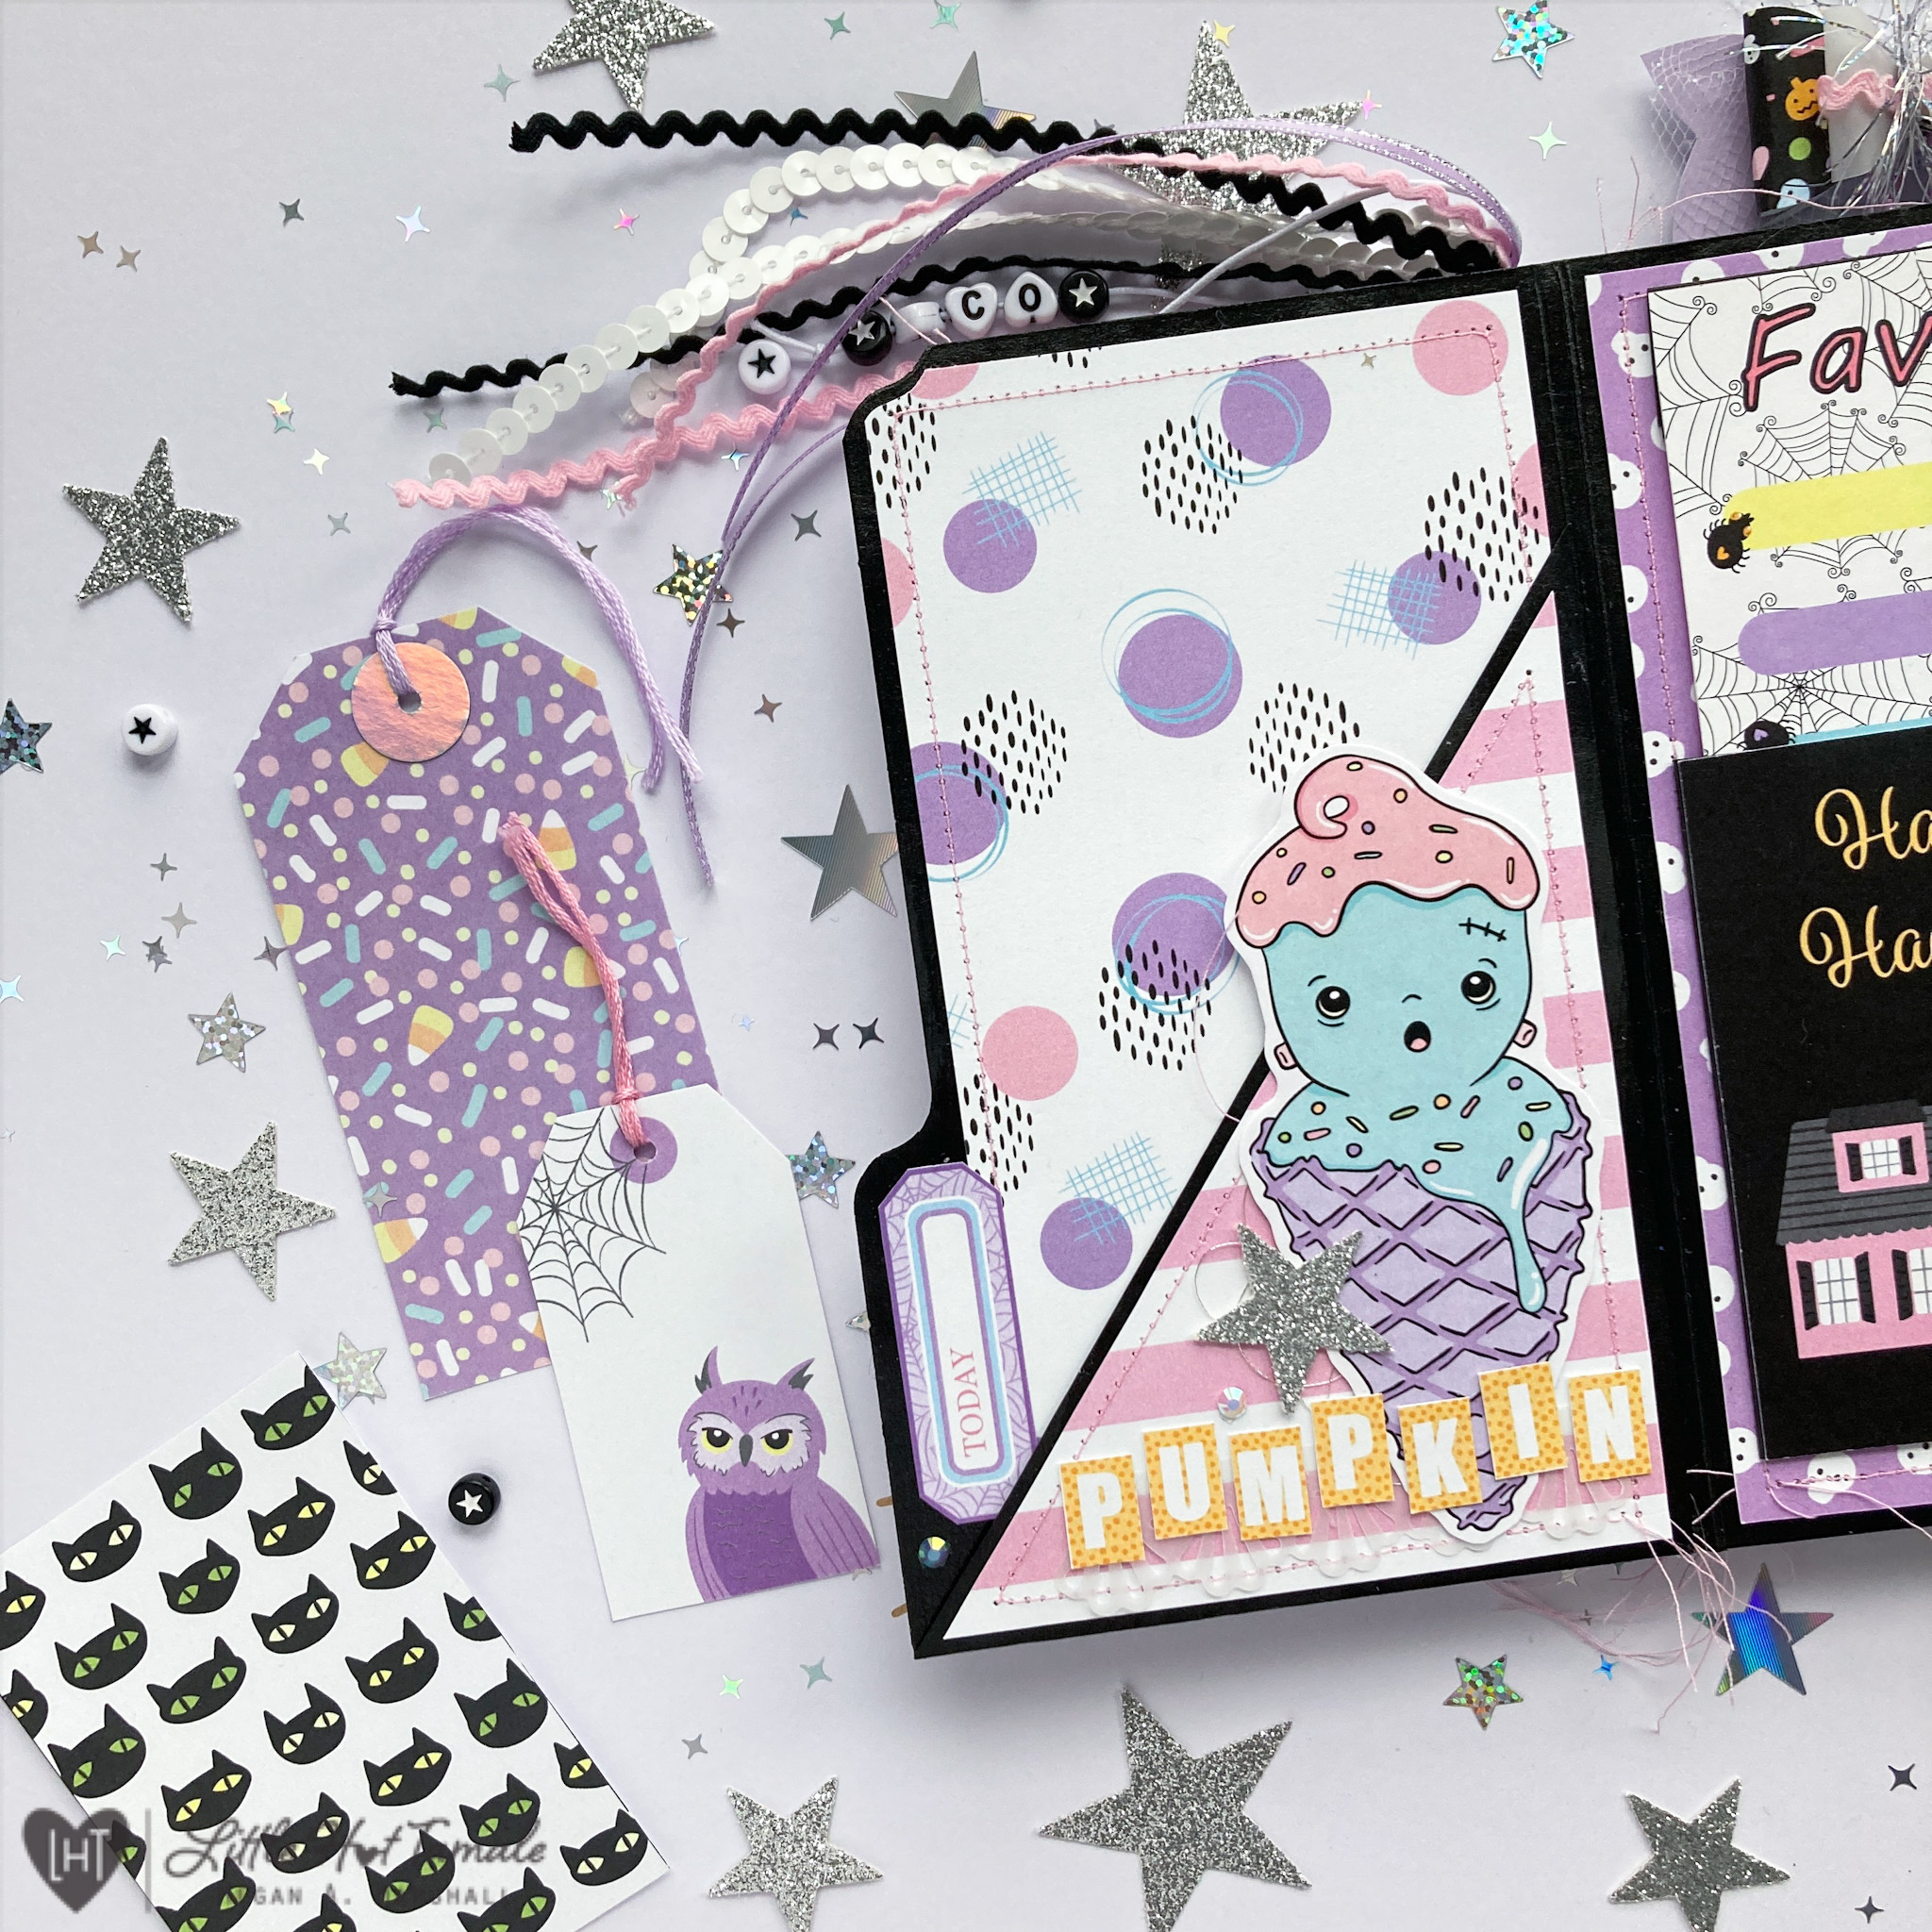
Tags are also a great way to use scrap paper. Snip a triangle off one corner and take that triangle scrap, flip it over and line it up to the opposite corner to get a perfect tag every time. Woot Woot!

Page 2 is all about layered pocket cards. I wanted a focal card on top (just there to be pretty at 1st glance). I chose this one because of the black background, it really stands out against the white favorite card and lavender skull paper.

This is one the easiest ways to create a flip... besides sketchy washi tape that you end up gluing anyway. So... I took black paper that was about 2" wide, created a score mark down the center, and ripped the sides off. I made sure the texture core was showed when I adhered it. It's easier to glue it to the card first, then trim off the excess hinge before gluing it to the album. It's less guess work, and more accurate. You can get different looks depending on the core of the paper. Like for example, the ripped paper on the front of the mini album has a white core. Neat, right?

To prevent the cards from flipping open easily, I added a tiny Velcro dot on the bottom corner of the top card. Tiny Velcro dots can be found in most sewing departments. I really like the look of the ripped hinge for this project. It has creepy carefree vibe about it.
Now it's time to talk about HIDDEN TAGS. Yay! It looks difficult, but it's not... just a little planning is needed. For mine I thought it would be really cool to have more textures and tabs on the side of my book. This is a modification to my original tutorial (top loading tags). For the side loading tag option I added glue horizontally across the center of the lavender skull paper. Then I hot glued the top left edge half section, and finally the top edge. It's best to work in sections when working with hot glue. It dries quickly and you don't want to accidently grab a section with glue on it. Repeat process to the bottom section.
Ok... this is where I accidently made a construction error with my mini album. Side loading pockets interfere with the very last spread, it prevents it from opening properly since the album reverses. It's not a big deal for me. I should of tested it before I glued it down. Apparently I was focused on the "cool factor." LOL I wanted to let you know just in case decide to go this route.

Another tag flip for the WIN! I told you there were lots of real estate. You can even add a large photo or a group of small photos on the lavender skull paper. The photos can peak out behind the flips to encourage the viewer to flip the cards to see what it will reveal.

Before moving on, let's take a closer look at the layered edge. I chose my main paper background paper first then I decorated the small area that showed on each layer. It was great place to start on a big project. The October element fit perfectly on the last file folder rounded tab. Then I added a layered embellishment to the other half of the tab. It consists of a journal label, thread, foam tape, holo paper, star ribbon, and glitter mesh ribbon (Hobby Lobby floral department). For the SPOOKY, I cut the block letter words into smaller pieces and backed them with holo paper. So cute and the perfect size for a narrow space.

Page 3 and 4. I kept it minimal. Page three is a pocket page created with the file folder and special folding (YouTube tutorial). I added an enlarged BINGO card from LHT Creepy Cute elements. I wanted to point out the BINGO card because it would be great for a Halloween banner... project coming soon.

Spooktacular Ghost embellishment cluster. Vellum scalloped circle, light blue spiderweb, ghost, holo paper, foam tape, and then spooktacular sentiment. Oh... and how can I forget, a little gem for added sparkle. I really like the vellum touches throughout the album, it softens the colors just a tad without being distracting.


A little tag flip for this spread with a ripped paper hinge. The ghost page I left very simple to allow me to grow with my mini album. Maybe I'll take a lot of photos and need an envelope to hold them or this may be the perfect spot to adhere ephemera from a fall event (e.g. a corn maze map).
If I made this album again I would add a top loading hidden tag option to this page. I was really excited to get started and didn't plan well. That's why I added a festive bow paperclip to the top to help compensate the emptiness. I was inspired by puchy_tats on instagram. I loved how she added tulle and eyelash trim to hers.

I used my template from Meg's Templates to create mine.
1.) Bow C is created with vellum and narrow RicRac down the center lengthwise. I used a small amount of hot glue.
2.) Bow B with pattern paper.
3.) A piece of tulle with thread knotted around the center so that it will mimic a bow shape. 3.) Bow B flat piece in cardstock
4.) paperclip
5.) Bow B again
6.) Glue all the pieces together and wrap eyelash trim around center of the bow through the paperclip and hot glue to keep in place.

The back page is one of my favorites, but I struggled with it the most. The original design had a tiny tuck spot, but I really wanted to add some kind of large envelope. I ended up creating something similar to my Shaker Envelope Tutorial. I used 2 star dies on the front of the coin envelope to emulate a whimsy feel. Then I added a piece of tulle and white cardstock that was larger than the front of the envelope. To create the shaker I only sewed half of each star. Then I added a small amount of sequin mix and sewed around 1.5 more times. For me, stars are difficult to sew around so I went with a messy look. Then I trimmed the tulle and cardstock a little smaller than the front to the envelope. I decided to add cardstock for 2 reasons. 1.) durability, it's on the back cover of the mini album and I intend to use this section the most. 2.) I was afraid transparency film would scratch over time. I didn't want this project to be my test subject, lol.

Then I added a little embellishing down the side because the 2 stars looked so unbalanced to me. In my art classes I was taught odd numbers look more appealing... I don't how true that it, but in this instance I think it was. The little layered section I repeated the vellum border punch element and added another scalloped circle, but with holo paper this time.


The back cover page flips down to reveal more opportunities. I also added a top (bottom?) loading tag option to this page since I neglected to add one earlier.


This is the reversed book spread. To access it you must remove the "looks cool" tags from the side loading hidden section. If you don't, you may end up bending them. By this time of the creative process I was ready to be done so I just repeated what I did on the cover. This section is larger so I rotated the pocket cards for a different look. I'll probably add something later, but I think it looks cute as is. We'll see.

You may be wondering how I added the tassel without the typical eyelet. I wrapped lightweight elastic around one of the gussets (section on the spine between the pages) and did an overhand knot. Leave elastic tails. It should be a little snug, but not too much. You don't want to cause the file folder to bend, but you don't want the elastic to slide around. For the ribbon I tried to pick options that were narrow. Then I double knotted the middle section of the ribbon with the elastic tails. To finish it off I added a few beads to the elastics. The star beads are from Hobby Lobby and the heart letters are from Michaels.

This is the spread that I added the elastic tassel to.
For the actual documenting part I'm NOT going to be strict about chronological order. I know that doesn't work well for me and it stresses me out. I'll add dates here and there. I'm staying far away from Day 1, Day 2. For me, if I miss a day my inner gollum will be like... "it's ruined." I know it's not, but the thought will cross my mind. lol
The extra large envelope on the back will home special stories or something I thought was funny. Nothing fancy, just basic paper. You can also do a daily list here if you want to include something chronological in your album.
Thank you so much for taking the time to read about of my October Daily. I really enjoyed writing about my process. If you liked it, don't forget to pin it for later. I'll talk to you later. --Meg :)