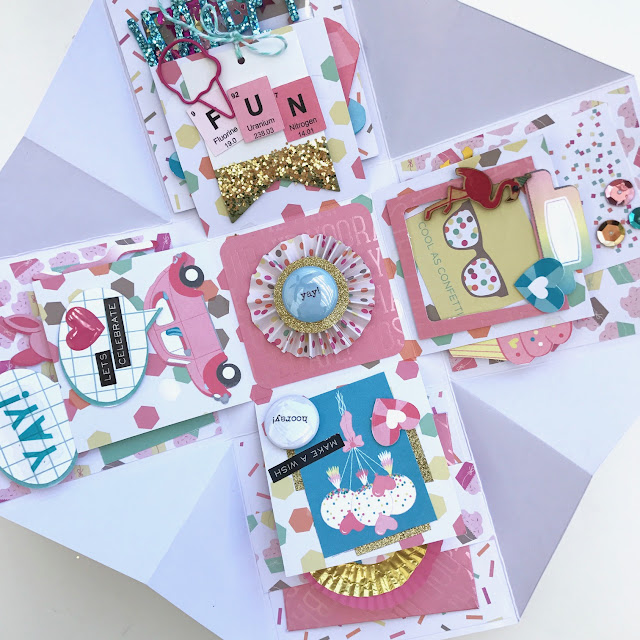
Hello again! It's Becky, and I'm so excited to show you my latest happy mail obsession: "exploding" boxes. If you follow me on Instagram (@becky_sher), this is no surprise to you -- I've shared several of them recently, and there's no end in sight.
But I think the one I'm sharing today might be my very favorite so far. I used some of the embellishments from Megan's collections, and they were the perfect addition to this little birthday box. Before I tell you about how I decorated it, though, let me start with the reasons that I love this little style of happy mail.
1. It looks fancy, but it's super-easy. (Which is my favorite kind of craft project!) The outer box is made from one piece of 12x12 paper, the inner piece is 9x9 and the lid is a 6.25-inch square. But the inside can be decorated with all those little paper scraps and embellishments you have lying around, so it's a good stash-buster.
2. It's got lots of little spaces to decorate. I'm intimidated by flipbooks with huge pages to decorate. I prefer lots of small areas, which is why I love pocket letters. These boxes are the same way: Lots of little flaps to decorate, which also means lots of fun for the recipient!
3. It feels like a gift. There's something about 3-dimensional projects that just feel more substantial, so these boxes make great gifts. Plus, there's enough room in the center for a small trinket, like a piece of candy or a jar of lip gloss.
If you'd like to see how these boxes are put together, check out this tutorial form my friend and pen pal Kira (@kira.gets.crafty) on her YouTube channel, Create Craft Repeat: https://youtu.be/CBPoV9YMuXQ. She's got all the details and measurements, so go check it out.
This little box is a gift for a little friend who is turning 9 next week. She is one my daughter's best friends, and she often comes over to craft with me. So I knew she would appreciate a box like this. I intended to fill it with more stickers and crafty bits, but I was having so much fun decorating the flaps that I didn't leave a lot of space for treats! I did include a small envelope with a birthday note, and I tied an enamel pin to the top of the box.
I used two of Megan's collections for this project -- Winter Wishes and Sweet Life. While both were released as holiday collections, there are so many elements in each that are great for everyday crafting. And Sweet Life especially is perfect for birthdays with its balloons, cupcakes and other sweet treats. I mixed the embellishments from the collections with a paper pad that I already had ("Confetti" by DCWV form Michael's) -- they were a perfect match.
I will be giving this to my little friend in person, but if you're this to a pen pal, it fits perfectly in a 6x6x6 cardboard box. You can often find them in the mailing supplies section at the post office or at a store like Staples or Target. Once I realized how much I love making them, I bought a pack of 12 cardboard boxes on Amazon. I fill the box with crinkle paper and nestle my project inside. Unles you've added a lot of extra goodies it still light enough to be sent by first-class mail.
I hope you'll give this little box a try -- I promise you won't regret it!


